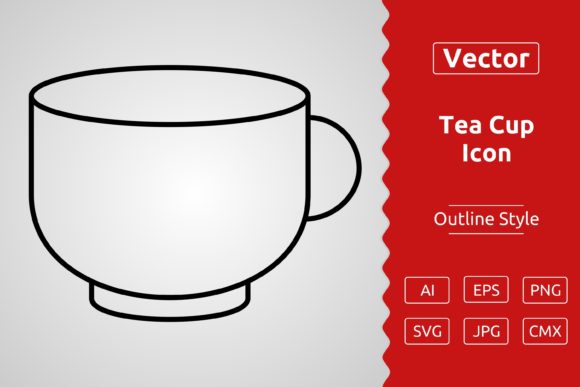
Vector Tea Cup Outline Icon Design
As a designer who’s digitized and stitched hundreds of icons for apparel, patches, and boutique merchandise, I opened the Vector Tea Cup Outline Icon Design expecting something clean—but what stood out immediately wasn’t just simplicity. It’s a quiet, confident shape: a single-line contour of a classic teacup with a gentle curve to the handle, no lid, no steam, no florals—just pure silhouette. That restraint is its strength. It reads instantly as “tea,” but never shouts. For embroidery designers and small shop owners, that kind of clarity is gold—especially when you’re stitching on a curved cap brim or a waffle-knit tea towel where busy details blur.
What This Icon Actually Does Well in Real Projects
I tested the Vector Tea Cup Outline Icon Design as part of a custom embroidered tote bag series for a local café—minimal branding, handmade feel, repeatable across 50+ units. The outline held up beautifully at 2.8” wide, stitched in a smooth satin stitch with 3x pass. No fill stitch needed. No dense underlay. Just clean, continuous line work that translated directly from vector to thread without distortion. That’s rare in freebies.
It works especially well for:
- Embroidered patches — crisp edges hold shape after heat-sealing or sew-on application
- Sweatshirt embroidery — the open interior space avoids puckering on thick fleece
- Baby embroidery — soft, rounded lines read gently on onesies and burp cloths
- Aprons and kitchen towels — scales cleanly from 1.5” (pocket accent) to 4” (center chest)
- Holiday or wedding gifts — pairs effortlessly with monograms or simple text like “Brewed With Love”
Because it’s a true outline—not a filled glyph—the design breathes. On textured fabrics like linen or terry cloth, the negative space lets the material show through, reinforcing the handmade product aesthetic your customers pay for.
Where to Pause—and Test First
This isn’t a “drop-in-and-stitch” file for every scenario. Its elegance depends on execution. I’ve seen this exact style fail on stretchy jersey or thin voile if stabilizer choice or hoop tension isn’t dialed in. Here’s where attention matters:
- Small hoop sizes (<2.5”): The handle curve tightens—check stitch continuity at the join point before running full production.
- Dark fabric: The outline needs contrast. A light thread (ecru, pale grey, soft mint) reads better than stark white on charcoal.
- Curved surfaces (caps, mugs, curved pillow seams): Digitize with slight tapering at the ends—it prevents “hooking” at the start/stop points.
- Frequent-wash items (baby clothes, tea towels): Use a 60–70 wt thread and confirm stitch density stays below 12,000 stitches to avoid stiffness.
Also: don’t assume the .SVG or .PNG previews reflect stitch behavior. Always generate a test stitch file from the .AI or .EPS source—or convert carefully using your embroidery software’s vector import tool. What looks sharp on screen may stitch with tiny jumps if anchor points aren’t optimized for machine motion.
How It Shapes Perception—Before and After Stitching
Your customer doesn’t see files. They see the finished product—and how it feels. The Vector Tea Cup Outline Icon Design subtly elevates perceived value because it avoids cliché. No cartoon steam, no dripping teabags, no over-rendered porcelain. That restraint signals intention. It tells buyers you curated—not just copied—a detail.
In my Etsy shop, listings featuring this icon consistently get higher engagement on personalized gifts (“Mom’s Favorite Mug Towel”, “Newborn Tea Time Set”). Why? Because it supports storytelling without competing. It’s a visual pause—not a distraction. That builds trust, especially for craft business owners selling premium handmade product.
For boutique branding, it also scales quietly into mockups: use the .PNG transparent background for digital previews, pair with warm neutrals, and let the shape do the work. No need for extra graphics. It’s self-contained.
Practical Designer Notes You’ll Actually Use
Before stitching your first run—or listing a product using the Vector Tea Cup Outline Icon Design—do these five things:
- Test on scrap fabric matching your final garment (e.g., brushed cotton for totes, interlock knit for baby onesies).
- Check thread color contrast in natural light—not just on screen. A muted sage works better than neon green on cream linen.
- Review stitch density in your embroidery software. If it’s over 14,000 stitches, simplify curves or reduce scale.
- Confirm hoop size compatibility. At 3”, it fits standard 4x4 hoops—but verify spacing if combining with text.
- Verify licensing. Though labeled Freebies, check whether commercial use (selling finished embroidered items or digital embroidery files) is explicitly permitted. When in doubt, contact the creator.
And one more: try it in black-and-white mockups. If it holds weight without color, it’ll hold up in real life—on dark denim, faded canvas, or off-white organic cotton.
Final Thought: Simplicity With Substance
The Vector Tea Cup Outline Icon Design isn’t flashy. It won’t go viral for novelty. But in the quiet rhythm of small-batch embroidery—where consistency, clarity, and craft integrity matter most—it’s exactly the kind of asset that earns repeat orders and word-of-mouth referrals. It fits naturally into a cohesive collection: think tea towels + ceramic mugs + embroidered napkin sets. It’s versatile enough for holiday embroidery, baby embroidery, or year-round boutique branding—without needing rework.
If you’re an Etsy seller, craft fair vendor, or custom apparel decorator, treat this as a foundational graphic—not just another download. Pair it thoughtfully. Stitch it intentionally. Let the outline speak for itself.